Tips for Proper Installation of Exposed Cisterns
August 26, 2025
Exposed flushing cisterns are among the most popular bathroom solutions due to their easy installation, accessibility, and wide range of models – both in new builds and renovations. For flawless operation and long service life, proper installation is essential.
Below, we present the four most common installation methods along with practical tips for each.
Low Installation
In low installation, the cistern is mounted above the toilet bowl. This is the most common setup in households.
Installation Tips:
- Check wall strength: suitable surfaces include brick, concrete, or reinforced drywall.
- Use the installation template for accurate marking.
- Recommended button height: 90–110 cm from the floor, accessible for children and elderly users.
Usually included with the cistern:
- Flexible connecting tube
- Flushing pipe (typically 270 x 220 mm, Ø 50/44 mm)
- Screws and brackets
- Installation template.
High Installation
High-mounted cisterns (160–200 cm from the floor) provide stronger flushing and save space, allowing the toilet bowl to be positioned closer to the wall.
Additional items required (usually not included with the cistern):
- Longer flushing pipe
- Pipe clamps
- Pull-cord handle for flushing.
Installation Tips:
- Pull-cord length: approximately 100–120 cm; not too long or taut.
- Route pipes as straight as possible, avoiding sharp bends.
- Ideal solution for very small bathrooms.
Close-coupled Installation
Close-coupled models are mounted directly on the toilet bowl. This solution is suitable if you want a quick, visually clean setup without extra drilling.
Toilet bowl models suitable for monoblock cisterns usually have an extended rear section.
Installation Tips:
- Verify compatibility of the toilet bowl with the monoblock cistern (e.g., Laguna Monoblock).
- After installation, check the seal between the bowl and the cistern.
- Advantages: no visible pipes, quick installation.
Corner Installation
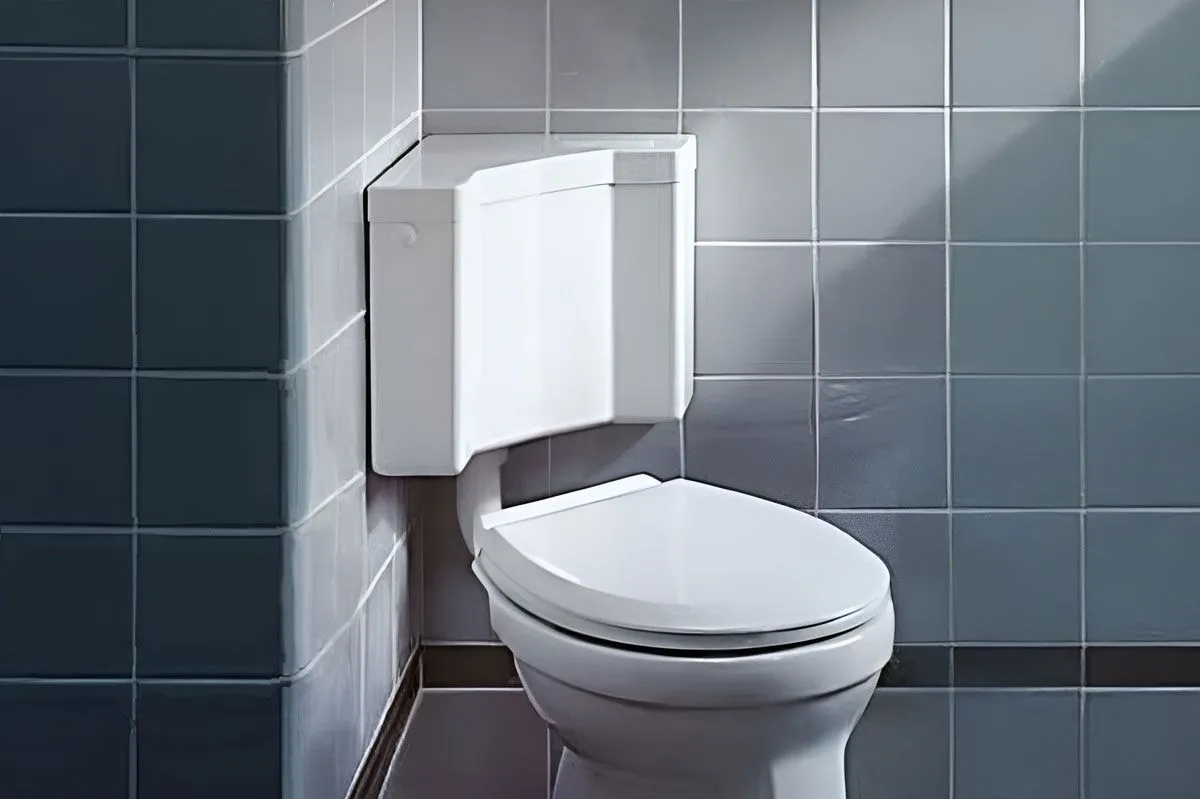
Corner cisterns (e.g., Linea) allow installation in a corner – an excellent solution for attics, small bathrooms, or non-standard layouts.
Installation Tips:
- Measure distances from both walls carefully for symmetrical placement.
- Route pipes at the correct angle to ensure proper flushing.
- The flush button should be easily accessible.
Recommended Installation Heights
- Low installation: flush button 90–110 cm from the floor.
- High installation: cistern 160–200 cm from the floor, pull-cord 100–120 cm from the floor.
- Close-coupled installation: depends on the toilet bowl height.
- Corner installation: customized but symmetrical according to space.
Sealing and Pipes
- Use high-quality seals.
- Pipes should be straight without sharp bends.
5 Golden Rules for Successful Installation
- Plan in advance – height, accessories, pipe lengths.
- Check the package contents, especially for high installation.
- Adapt fixation based on wall type.
- Verify sealing at all joints before finishing.
- Do not improvise – use proper pipe lengths and original accessories.
Most Frequently Asked Questions (FAQ)
Can I install the cistern myself?
Yes, if you have basic tools and some manual skills. For complex installations, it’s better to call a professional.
Check joints, seals, and pipe lengths. Most often, a loose connection is the cause.
Yes, most new models allow flexible connection without major modifications.
Conclusion
Regardless of installation type – low, high, monoblock, or corner – successful installation of an exposed flushing cistern depends on good preparation, correct selection of accessories, and precise execution.
Questions or need more information? We are happy to advise you!


